

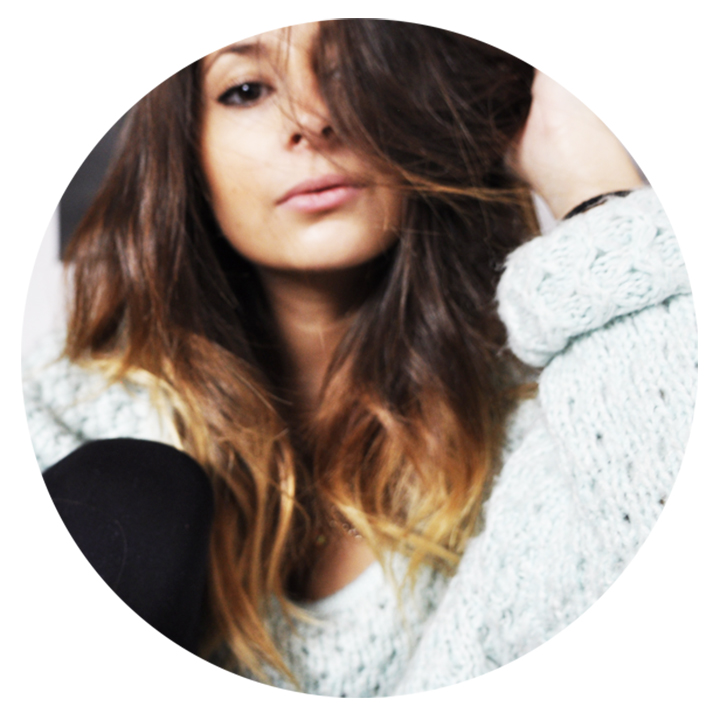
Who wants to get a nice ombré hair and avoid paying $$$ in a salon ? I'm pretty sure most of you want to!
Well, here is the tutorial I did on How To Get Ombré Hair at home using L'Oréal Paris Wild Ombrés Préférence Kit ! Here is a video I made to show you how to do because I thought it would be easier to explain. However, this post will be more detailed, so keep reading!
Contest explained at the end of the post
Qui veut avoir de beaux cheveux ombrés sans payer une fortune le coiffeur ? Je suis certaine que beaucoup d'entre vous en raffole !
Bien, voilà un tuto sur Comment "Ombrer" Ses Cheveux à la maison en utilisant le kit de L'Oréal Paris Wild Ombrés Préférence ! Voici une vidéo que j'ai faite (en anglais mais compréhensible!) car j'ai pensé que c'était plus facile à expliquer et montrer. Cependant cet article est plus détaillé, donc ne vous arrêtez pas de lire!
Règles du concours expliquées à la fin de l'article
VIDEO OF THE TUTORIAL - DON'T FORGET TO WATCH IN HD FOR BETTER QUALITY
What's in the kit ? Watch the video
STEP 1
Section your hair. Pour the product (the mixture you have done first) on the "expert brush".
Start by brushing the ends and tips of your hair - the product immediately does its job. It will create the graduate lightening effect.
STEP 2
Apply the product (always with the brush) on the section of your between your ears and chin. Take the second layer of your hair and do the same. Now wait.
STEP 3
After 25 minutes, check your hair and what colour you're getting and you will judge by yourself if you want it lighter or not. You can choose to apply it up to 45 minutes (not more, because let's not forget it's bleach!)
STEP 4
Rinse your hair and use the conditioning shampoo from the box. Then, I applied John Frieda Sheer Blonde conditioner to avoid getting a yellow colour and as my hair was still a bit dry, I applied TreSemmé Repair mask. Those are my favourite products to get soft hair!
STEP 5
Don't forget to apply an oil, that will avoid getting damaged hair as you bleached it. I applied Moroccan Argan Oil from Organix and then John Frieda Full Repair Deep Infusion to protect the ends and tips.
Now you just have to blow-dry your hair, see the result and win the contest !!!
__________
Qu'il y a-t-il dans le kit ? Voir la vidéo
ETAPE 1
Séparez vos cheveux en deux parties. Versez le produit (le mélange que vous venez de faire) sur "l'expert brush".
Commencez par brosser vos pointes - le produit agit immédiatement. C'est cela qui va créer l'effet dégradé de l'ombré.
ETAPE 2
Appliquez le produit (toujours avec la brosse) entre l'oreille et le cou. Détachez la deuxième partie de vos cheveux et faites de même. Plus qu'à attendre!
ETAPE 3
Après 25 minutes de temps de pose, vérifiez que la couleur que vous obtenez vous plaise et vous jugerez par vous-mêmes si vous devez prolonger le temps de pose ou non. Vous pouvez l'appliquer jusqu'à 45 minutes (attention: pas plus! N'oublions pas que c'est un produit décolorant et chimique)
ETAPE 4
Rincez et utilisez le shampoing donné dans la boîte. Ensuite j'ai appliqué le conditioner John Frieda de la gamme Blonde pour éviter d'obtenir une couleur jaunâtre, puis comme mes pointes étaient assez sèches à cause de la décoloration, j'ai appliqué un maque réparateur TreSemmé.
ETAPE 5
N'oubliez pas d'appliquer de l'huile pour cheveux, histoire d'éviter d'avoir des cheveux secs! J'ai appliqué une huile d'argan de la marque Organix puis une huile réparatrice de pointes de la gamme Full Repair John Frieda.
Maintenant vous n'avez plus qu'à sécher, voir le résultat et gagner le concours !!!
_____________________________________
♡ C O N T E S T ♡
Once your Ombré done (or even you already have one), leave a comment, follow me ("like") on Facebook HERE and follow me on Instagram HERE.
Then, post a photo of your ombré hair on Instagram using the hashtag #LaLulitaContest or send me the link to the photo in a comment BUT not a simple picture, it has to be stylish, creative, beautiful and cool !
The winner will appear in a post on my blog, on my Facebook page and on my Instagram, and will get a little gift from L'Oréal Paris!
The contest ends on the 20th of April 2013.
Last thing: don't forget to tell me if this post and video were helpful.
♡ C O N C O U R S ♡
Une fois votre Ombré fait (ou même si vous en avez déjà un), commentez cet article et "aimez" ma page Facebook ICI puis surtout suivez moi sur Instagram ICI.
Ensuite, postez une photo de votre ombré hair sur Instagram suivi du hashtag #LaLulitaContest ou bien envoyez moi un lien de votre photo en postant un commentaire. MAIS pas qu'une simple photo! Elle doit être cool, créative, jolie, et stylée !
La gagnante apparaitra sur mon blog, ainsi que sur ma page Facebook et mon Instagram et gagnera un produit L'Oréal Paris!
Fin du concours: 20 Avril 2013
Dernière chose: n'oubliez pas de me dire si l'article et la vidéo ont été utiles et sympas.
GOOD LUCK
BONNE CHANCE
Aucun commentaire:
Enregistrer un commentaire